Configuring a Watch List
You can create a , which is a place for users to store frequently-used business objects, similar to bookmarks or favorites. The watch list appears as a button on your top tab bar, and you can add objects.
If a relationship between the business object and MyShelfItem does not exist, then you must create one. After creating the relationship, continue to configure the watch list:
|
1.
|
Within the Configuration Console, open the Watch List workspace. The watch list appears, sorted by object. |
|
3.
|
Select a business object (for example, change) and enter the configuration expression. |
For example, enter $((("Change " + ChangeNumber) + ": ") + Subject)
|
4.
|
Click Save. The new business object appears on the Watch List page. |
|
5.
|
From the business objects page, select your object (for example, change). |
|
6.
|
Within the business object page, select the Layouts tab. The Layouts page appears. |
|
7.
|
Click the layout you want (for example, change). The Layout Editor appears. |
|
8.
|
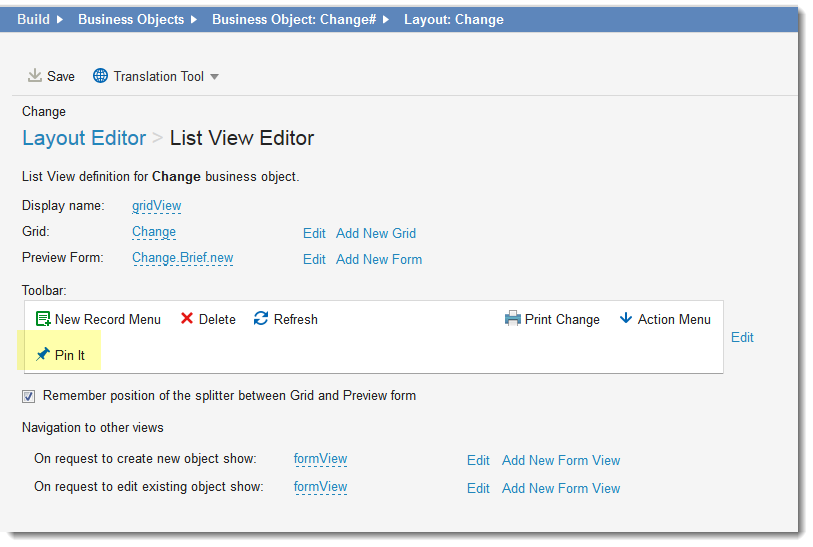
You can view your object in grid view or form view. For this example, click gridView. The list view editor appears. If Pin It does not appear in the toolbar area, you can add it. See Using the Toolbar Editor. |
Change Layout - Pin It Button
|
9.
|
On the right side of the window, click Edit. The Toolbar Editor appears. |
|
10.
|
Click Edit  next to the Pin It button. The toolbar button editor appears. next to the Pin It button. The toolbar button editor appears. |
|
11.
|
Enter the options under the General tab. |
 --fields--
| Button Invokes Action |
Enables this button to perform an action. Select an action from the drop-down list. |
| Display |
Specifies how the Pin It button appears. Select from image and text, image only, or text only. |
| Image |
The image to display. Select an image from the drop-down list. The default image is SaasAddToMyShelf.png |
| Text |
The default text to show with the image. Select either default to show the default text with the image, or select custom to enter your own text in the box. |
| Tooltip |
The text to appear when users hover over the button. The default is Pin It. |
| Argument |
|
|
12.
|
Click Save. The window closes. |
|
13.
|
Click Save again. The toolbar editor closes. Pin It appears in the toolbar area. |
|
14.
|
Click Save  from the toolbar.
Watch List is added to the toolbar. from the toolbar.
Watch List is added to the toolbar. |