Creating a Report Quick Action
You can use the Create Report to run an existing report against selected records. For example, you can create a printable report that lists selected items in a record.
|
1.
|
Within an incident record, from the quick actions menu, select Edit Actions. The Quick Actions page appears. |
|
2.
|
From the Create New Actions tab select Run Report. The Run Report quick action appears. |
|
3.
|
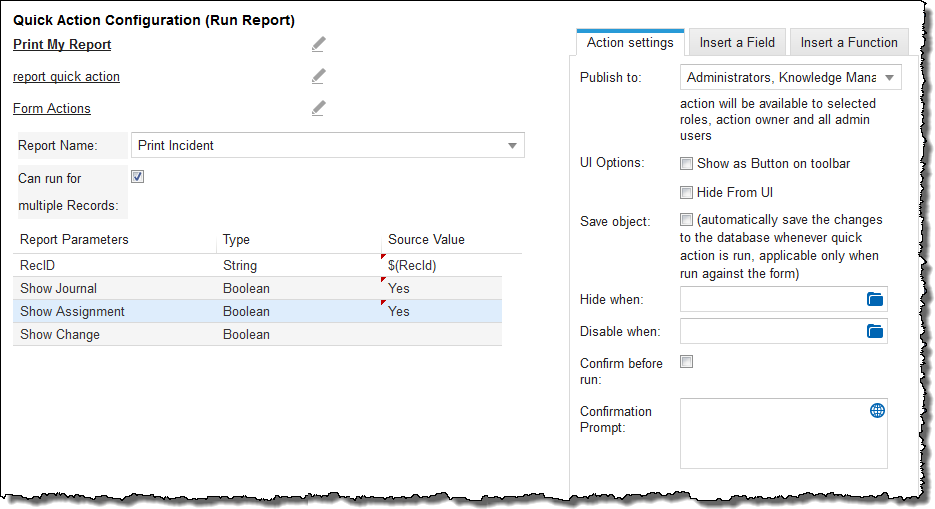
Enter information as needed in the following fields: |
Report Quick Action
| Set action name |
A unique name for this quick action, such as Print My Report. |
| Enter action description |
Enter report quick action. |
| Assign a category |
The category. From the drop-down list, select Form Action. |
| Report Name |
The name of the report. Select Print Incident from the drop-down list. The report parameters appear below. |
| Can run for multiple Records |
Enables users to select multiple incident records and run the Print quick action. When enabled, you can select multiple records in the incident list view. |
|
4.
|
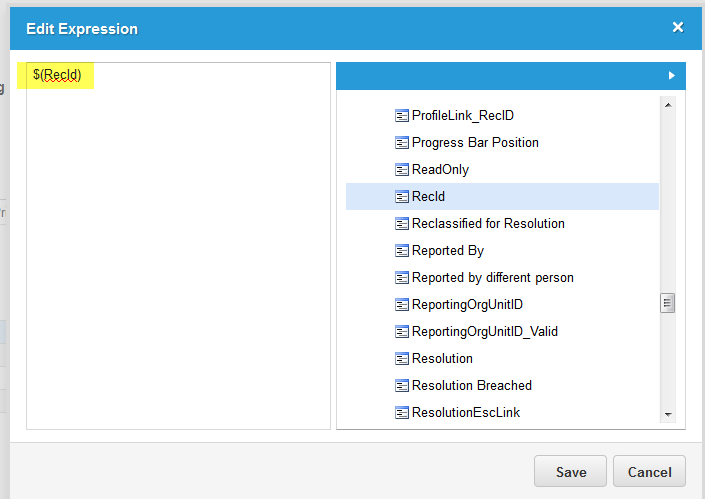
Double-click the Source Value field for the RecID to activate it, then select the folder. The Edit Expression window appears. |
|
5.
|
Navigate to Incident > Fields, then double-click RecID. the $(RecId) expression appears. |
RecID Field
|
7.
|
Double-click the Source Value field for Show Journal, then enter yes. |
|
8.
|
Double-click the Source Value field for Show Assignment, then enter yes. |
|
9.
|
From the Actions Settings tab, set the following: |
| Publish to |
Click the drop-down menu and select the roles which need access to this template (such as administrator, Service Desk Analyst, Service Desk Manager). |
| Hide from UI |
Leave this option deselected to make this template available to HEAT user roles you have published to. |
|
10.
|
Click Save. The quick action now appears on the list of actions. |