Adding the Social Board to a Role
To expose Social Service management based on a role, first make the Social Board workspace available for selection in the Service Desk Configuration tab, and then use the Service Desk Configuration tab to grant access to the Social Board workspace to a role:
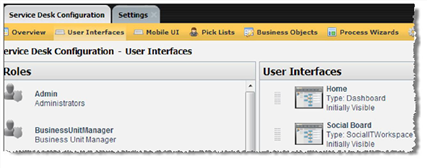
| 1. | Within the Configuration Console, open the User Interfaces workspace to view available roles. Select the role to see the available tabs and workspaces for that role. |
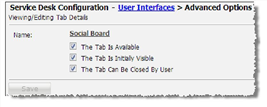
| 2. | If the Social Board workspace is available, you can optionally change its display order by dragging it up or down the workspace list. To manage the visibility of the workspace, click Advanced Options and adjust the properties as needed. |
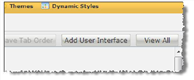
| 3. | Click Add User Interface. |
| 4. | Select the Social Board workspace. |

| 5. | Name the Social Board tab and define other properties as necessary. |
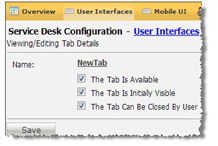
| 6. | Save your changes. |
The Social Board workspace is now visible for the Service Desk Configuration tab to enable access to the Social Board workspace for one or more roles.